I wish you could just plop a sauna down on the ground.
Alas, as any professional builder will tell you, a solid and level foundation prevents headaches during construction and protects against structural problems down the line. It’s definitely worth the time to do the foundation well, so I’ve spent the past three days focused almost exclusively on that task. Unfortunately, neither of my construction classes covered foundations, so I’ve been learning-by-doing and supplementing my education with YouTube videos and phone-a-friends.
To give you a sense of the challenge, I should describe the lay of the land. The lakeside spot I selected for the sauna is not level: the land slopes upward away from the water, with about a 1.5 foot rise from the edge of the site closest to the lake to the other edge. There’s also a large boulder within the footprint of the planned structure, mostly buried, but with an exposed dome that rises about a foot above the surrounding ground.
So, clearly, I have to build the sauna on top of an elevated deck that floats above the boulder and corrects for the sloping grade. The deck will be supported by posts going down to ground level, but those posts need to sit on something more solid than the ground itself, because the ground at my site is springy, like a gymnastics mat, and it would settle unpredictably under the weight of a building.
Why is the ground so springy? Early in this process I dug an exploratory hole, which revealed several distinct strata: compacted leaves on top, giving way to decomposing leaf litter held together by the roots of small shrubs; below that, a spongy brown soil reminiscent of peat (hence the springiness), crosscut by fairly substantial roots from the neighboring pines, maples, and oaks; and, below that, a layer of wet, gray clay, which contains a lot of melon-sized rocks.
That clay layer is only about a foot and a half down, and it gets really hard to dig any deeper due to those big rocks. (The shovel sparked the first time I hit one.) That poses a problem: a common approach to foundations begins with digging below the frost line, which in chilly New Hampshire is about 4 feet down. That’s impossible at my site.
So, with the advice of a family friend who knows a thing or two, I am implementing the following solution for foundation “footings”: I dig down to that clay layer, pour in about 2 inches of gravel, and then set a stack of 4”x8”x16” concrete blocks to bring things back up to ground level. Then, a metal post base secured to the top of the concrete blocks with masonry screws provides a secure housing for a pressure-treated post, which goes up to connect to the elevated deck. Since the footings aren’t set below the frost line, this system is designed to allow a bit of wiggle room to accommodate any frost heaving that does occur. I wouldn’t trust this for a large structure like a house, but for a small outbuilding it seems good enough. (I hope!)
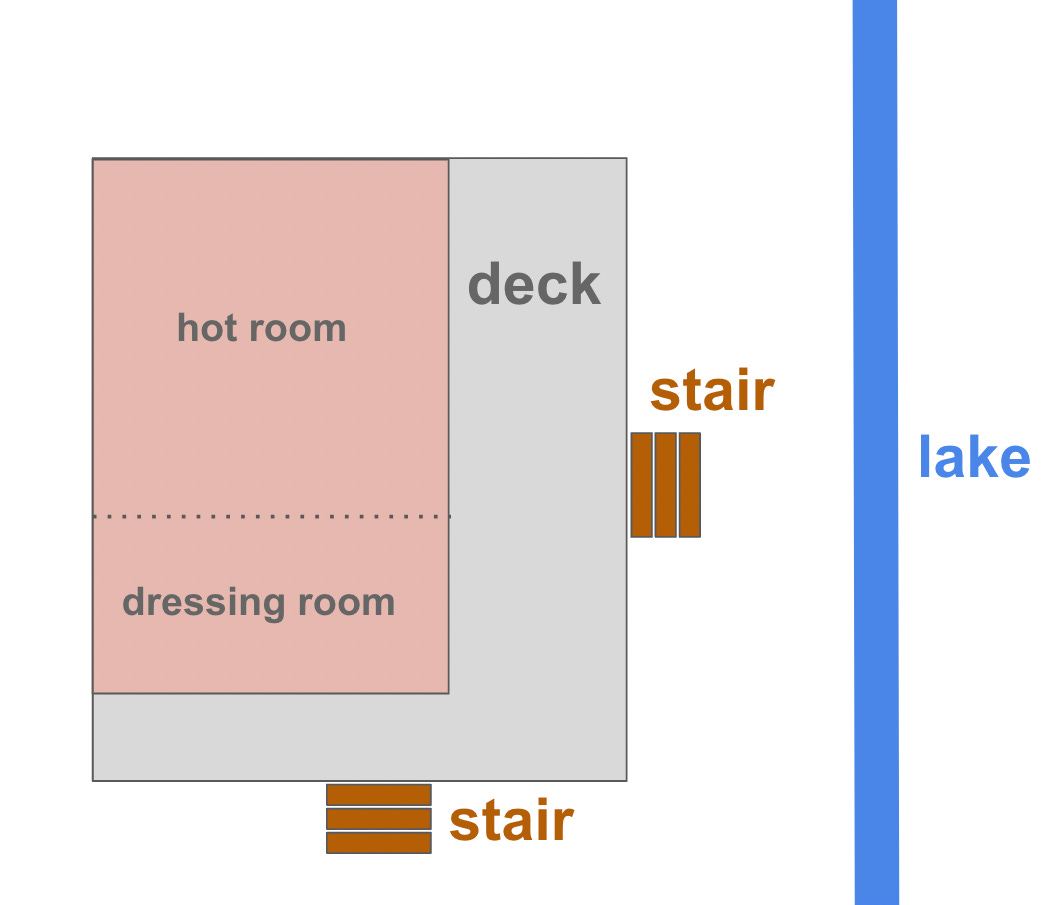
To support the deck, which will be 12’x14’, I need to build seven footers: one for each corner, one in the middle of each of the long edges, and one more near the center of the deck to help support the sauna stove (which can weigh several hundred pounds when loaded up with sauna rocks). The deck is a bit bigger than the sauna building itself, which will be roughly 8’x12’ and set back into one corner of the deck, like so:
What do you think of the layout?
Anyway, I’ve done a ton of digging over the past few days. Luckily, I love digging holes. Always have. I read the book “Holes” when I was a kid — the story is set at a juvenile corrections facility where children are forced to dig a hole 5 feet wide and 5 feet deep, every day — and I remember thinking that sounded like not a bad way to spend a summer. What does it for me with digging is the unambiguous goal and the constant, visible progress, plus the fact that it’s a really killer workout. When I worked on the farm two summers ago, one of the first jobs I was given was to dig foundation holes for a new barn that was being put up, and this masochist was super stoked.
Anyway, this has been some challenging digging, mainly because of the roots and rocks. Some of the roots can be snipped out with pruning shears or loppers, but some are so big that I had to resort to hacking them out with an axe. Not that I minded that, either!

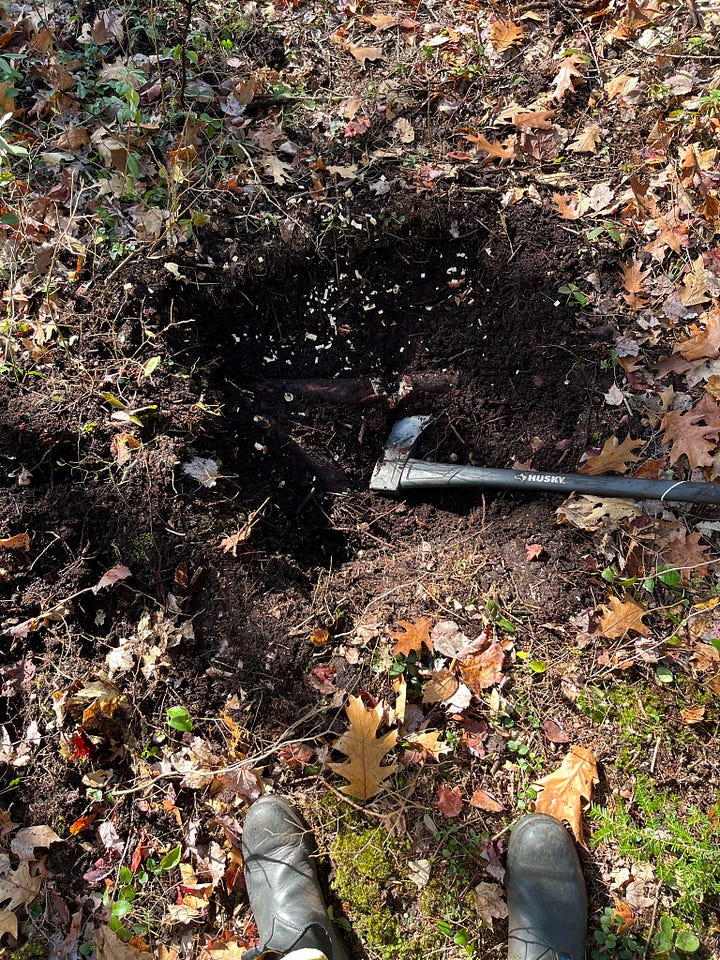
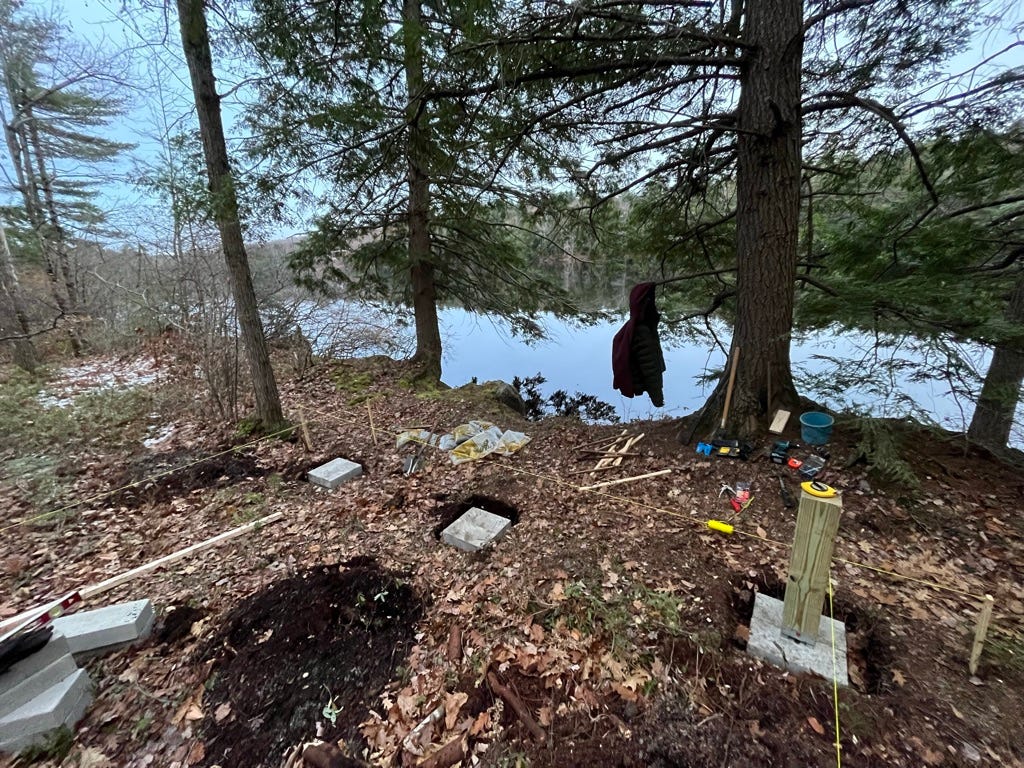
To make sure I was digging these holes in the right places, I set up a grid using some grade stakes and masons line. This was tricky to do by myself. To make sure that the corners were square, I used the 3-4-5 trick1, but it was hard to keep the measuring tape anchored in the right place on the line.
Once I had the holes dug, I did a run to Home Depot to buy the gravel and concrete blocks. Someday I hope to be able to do such an errand in an electric pick-up truck like the Ford F-150 Lightning, but for now I’m driving my manual-transmission, gas-guzzling ‘98 Corolla, affectionately known as the “Rolly.” I looked up the carrying capacity and decided I could haul about 1000 pounds of rock in my superannuated sedan. Let me tell you, the Rolly was riding low on the dirt road back to the cabin, but I took it slow and she performed like a champ.
Pouring the gravel into the base of the holes is a breeze, whereas getting the stack of concrete blocks to sit level is extremely painstaking work. But it’s all worth it for the moment when that little bubble of air sits pretty between the lines.


After three days of work, I’ve now got 6 out of 7 holes dug (I’m leaving the hole in the center of the platform until a bit later in the process), and level concrete pads in the 3 holes closest to the lake. To make sure the whole system works, I also installed the first post base and pressure-treated post. The post base claims it fits a 6”x6” post, but I had to chisel out about a quarter inch to get it to sit flush at the base.
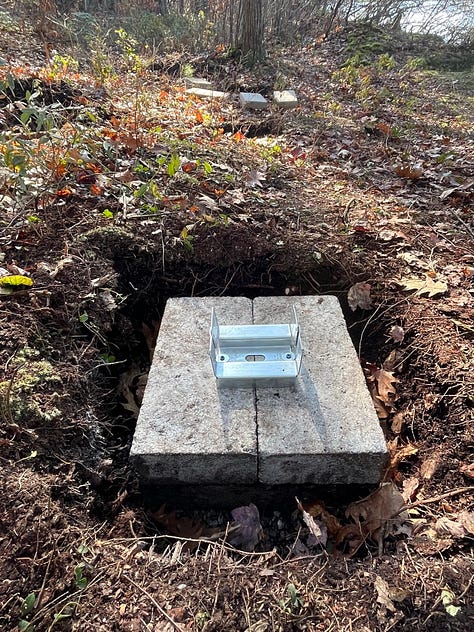
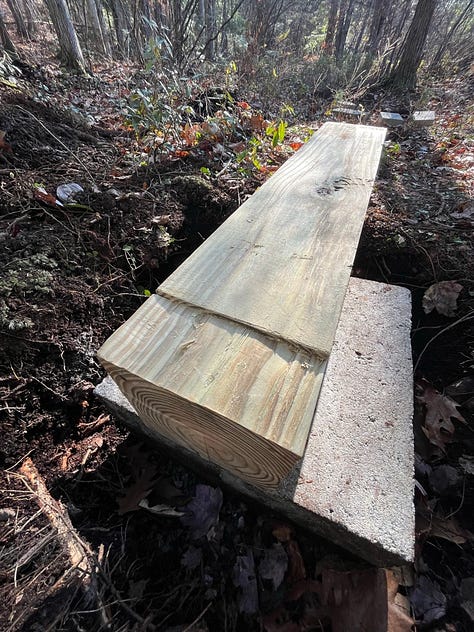

And that’s pretty much where things stand for now! I’m proud of the progress I’ve made by myself, but I’m really excited that, starting tomorrow, my brother is coming to help. And he’s bringing his new puppy, so the photos on this blog are about to get a lot cuter.
Thanks for following along!
—Jake
A right triangle with legs of length 3 and 4 has a hypotenuse of length 5. To check a corner for square, you measure 3 units along one edge from the corner, and 4 units along the other edge, and then measure the diagonal distance between those two points. If that distance is longer than 5, your corner is obtuse; shorter than 5 means your corner is acute.




Fabulous progress, Jake! So excited that Paul and Luca arrive today to join the build. As Luca’s Nan, I can attest that he is stinking cute. Keep the posts coming.